Relieve painful foot corns fast how to get rid of seed corns safely at home using simple treatments, OTC care, and prevention that really works.
How to Get Rid of Seed Corns
Tiny hard bumps on your feet can make every step painful. These are seed corns, small, rough patches that develop due to friction and pressure. If you’re wondering how to get rid of seed corns, the answer starts with understanding their cause and treating them safely at home.
Knowing how to get rid of seed corns helps prevent infection, relieve pain, and restore smooth skin. Many people try random remedies, but learning how to get rid of seed corns correctly ensures faster, safer healing. This complete guide explains how to get rid of seed corns using proven treatments, easy home remedies, and prevention methods that truly work.
Causes of Seed Corns
| Cause | Description |
|---|---|
| Friction and Pressure | Repeated rubbing from tight shoes or walking barefoot hardens skin layers. |
| Dry Skin | Lack of moisture thickens the skin, forming rough patches that develop into corns. |
| Foot Deformities | Bunions or hammertoes can create uneven pressure points on the soles. |
| Improper Footwear | High heels and narrow shoes increase pressure on specific foot areas. |
Symptoms of Seed Corns
| Common Symptoms | Details |
|---|---|
| Hard, Raised Bumps | Round, rough spots often on the sole or ball of the foot. |
| Tenderness or Pain When Walking | Especially noticeable when stepping or wearing shoes. |
| Dry, Flaky Skin | Skin around corns often feels thick and scaly. |
| Pin-sized Central Core | The “seed” — a small, hardened center — is what makes them painful. |
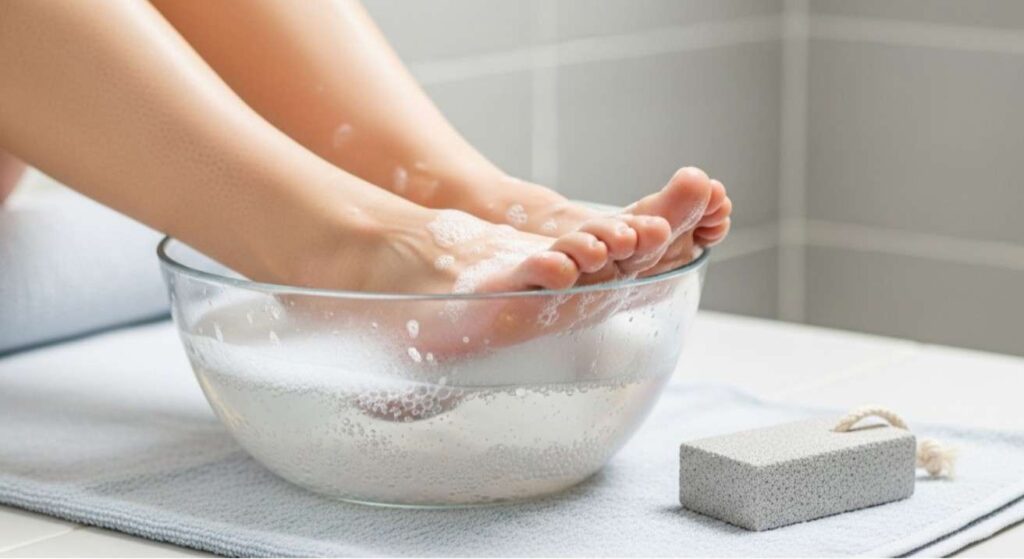
Step 1: Soften the Corn with Warm Water
Soak your feet in warm, soapy water for 10–15 minutes daily. This softens thick skin and makes removal easier.
- Add Epsom salt for extra relief and to reduce inflammation.
- Use a soft foot brush or pumice stone after soaking to gently remove dead skin.
Avoid scraping too hard, which can break the skin and cause infection.
This simple soaking routine is one of the safest ways to start treating seed corns at home.
Step 2: Apply Over-the-Counter Corn Pads or Cushions
Use non-medicated corn pads to relieve pressure and reduce pain while walking.
- Choose foam or felt pads that don’t contain salicylic acid if your skin is sensitive.
- Keep pads clean and replace them daily to prevent bacteria buildup.
- If using medicated pads, follow directions carefully to avoid irritation.
Cushioning reduces friction, helping your skin heal naturally over time.
Step 3: Exfoliate Dead Skin Gently
Once the skin is softened, gently exfoliate using a pumice stone or foot file.
- Move in circular motions to remove layers of thick skin gradually.
- Do not cut or shave the corn with blades this increases the risk of infection.
- After exfoliating, apply moisturizing cream to keep skin soft.
Regular exfoliation prevents seed corns from thickening again.

Step 4: Use Moisturizing Creams and Oils
Dry skin contributes to seed corn formation. Keep your feet hydrated daily:
- Apply urea-based or lactic acid creams that soften rough skin.
- Massage with natural oils like coconut or olive oil to lock in moisture.
- Wear cotton socks overnight after moisturizing for deeper absorption.
Hydrated skin stays flexible, reducing friction and preventing future corns.
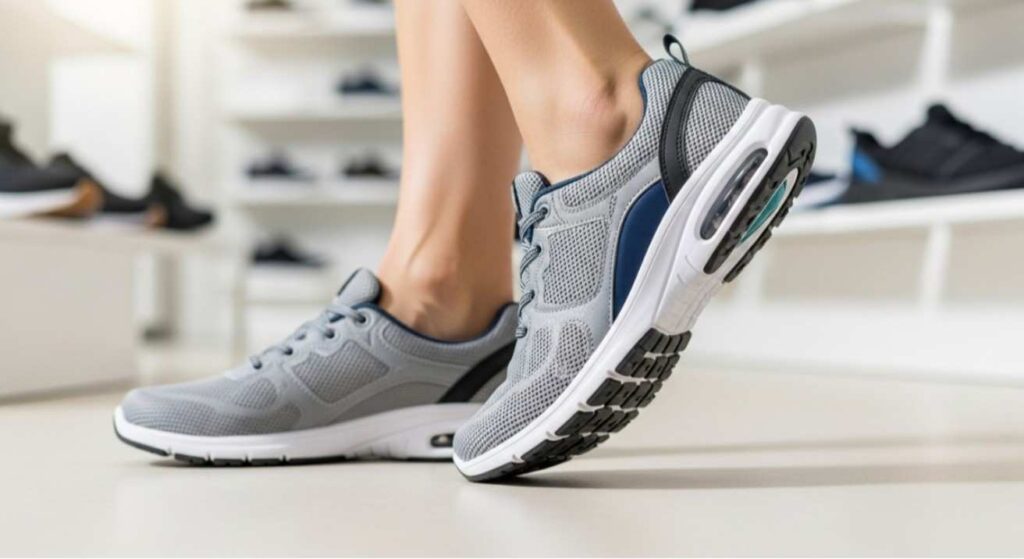
Step 5: Address the Root Cause—Footwear and Posture
Wearing proper shoes is crucial to prevent corns from coming back.
- Choose roomy, breathable shoes with cushioned soles.
- Avoid high heels or narrow footwear that increases pressure points.
- Use orthotic insoles if your feet roll inward or outward.
If you have structural foot issues like bunions or flat feet, a podiatrist can recommend corrective inserts for long-term relief.
Step 6: Natural Home Remedies
Several safe, natural ingredients can help soften and heal seed corns:
- Apple Cider Vinegar: Apply a soaked cotton pad for 10 minutes to loosen dead skin.
- Castor Oil: Moisturizes and softens hard spots overnight.
- Baking Soda Paste: Gently exfoliates dead layers and smooths the skin.
- Lemon Juice: Its acidity helps break down thick skin and reduces pain.
Use these remedies consistently for visible improvement in a week or two.
Step 7: When to See a Podiatrist
If pain worsens, bleeding occurs, or you have conditions like diabetes or poor circulation, professional care is essential.
A podiatrist can:
- Safely trim thickened skin.
- Recommend custom orthotics to correct foot pressure.
- Prescribe topical treatments or antibiotics if infection develops.
Never attempt to cut out a seed corn yourself medical treatment ensures safe removal without complications.

Prevention Tips for Long-Term Relief
| Prevention Method | Why It Helps |
|---|---|
| Moisturize Daily | Prevents dryness that leads to thick skin buildup. |
| Wear Proper Footwear | Reduces pressure and friction on common corn areas. |
| Keep Feet Clean and Dry | Prevents bacterial growth and odor. |
| Trim Toenails Correctly | Avoids pressure imbalance that can cause corns. |
| Check Feet Regularly | Early detection stops seed corns from becoming painful. |
Consistent foot care keeps seed corns from returning — prevention is always easier than treatment.
FAQs
Q 1: How long does it take to get rid of seed corns?
Most seed corns improve within 1–2 weeks of consistent care. Severe cases may take longer, especially if the root cause (like footwear) isn’t fixed.
Q 2: Are seed corns contagious?
No, seed corns aren’t contagious. They develop from friction and pressure, not from bacteria or viruses.
Q 3: Can I remove seed corns with a razor or blade?
No, avoid cutting corns. This can cause bleeding and infection. Stick to gentle exfoliation and soaking methods instead.
Q 4: What’s the difference between a seed corn and a plantar wart?
Seed corns are hard, dry, and caused by pressure, while plantar warts are caused by HPV and often have small black dots inside.
Q 5: How can diabetics treat seed corns safely?
Diabetics should never self-treat corns. Consult a podiatrist for safe removal to prevent ulcers or infection.